Bigle enables you to manage contract negotiations securely, eliminating the need to exchange multiple emails and ensuring a transparent process.
The negotiation functionality facilitates communication between the parties involved, including an organisation's internal members and their external counterparts.
Phases of the negotiation process
Each negotiation is unique and may vary according to the needs of the contract, but generally follows the following phases:
- Initiation by the user: The negotiation begins when the user selects a document and activates the process within the platform.
- Sending to the counterparty: Once the counterparty's details have been completed, the document is sent via email to the counterparty for review and suggested modifications.
- Review by the counterparty: The counterparty makes changes or comments, if necessary.
- Sending to the party: The document is sent back to the platform user who initiated the negotiation for evaluation.
- User actions: The user analyses the suggested changes and decides whether to accept them, reject them, propose new modifications, or comment or respond to comments.
- Iteration of the process: The negotiation can be repeated several times until an agreement is reached or concluded unsuccessfully.
- Completion of the process: Once the final version's content has been agreed upon, the negotiation is concluded.
The actions taken are recorded in the ‘Activity’ tab in the right-hand panel, ensuring the traceability of the process. Another tab in the same panel, called ‘Version history’, stores the documents generated at each process stage.
You can also add participants registered on the platform to the negotiation process from the ‘Team options’ section in the right-hand panel of the document environment:
- Go to the ‘Team options’ section.
- Click on ‘Participants’.
- Find the name of the participant you want to add and select it from the drop-down list.
1. Starting a negotiation process
To start negotiating a document in Bigle, follow these steps:
1.1 Document selection
Before starting a negotiation, it is necessary to have a document uploaded on the platform. You can negotiate documents created from templates or uploaded manually in .docx format.
Remember that you will not be able to start the negotiation process if the document is involved in another active process.
1.2 Starting the process
Within the selected document, go to the ‘Add step’ button on the left side panel and select the ‘Negotiation’ option.

When you select ‘Negotiation’, a third panel will appear on the right-hand side.
At the top of this panel, you will see a brief description of the ‘Negotiation’ process. Just below, you will find a field where you can choose the version to negotiate, among the versions generated in previous processes. Usually, the most updated version of the document's lifecycle is negotiated.

In this third panel, all the final versions of the previous processes will be displayed for you to choose the one you want to use. Once you have selected the version, click on ‘Select’.
Information about the final versions:
When you start a new process, it will build on the most recent version generated in the previous process, allowing you to continue the work from the appropriate point.
Within the process Click on ‘Start negotiation’ to start the negotiation.

1.3 Adding the counterparty and setting up notification
In order for the counterparty to be able to participate in the negotiation, it is necessary to complete two fundamental aspects:
- Enter the name and surname of the counterparty. This allows you to correctly identify the person with whom you will be negotiating.
- Set up notification:
- If you activate the email notification option, the counterparty will receive an automatic email with a link to the document.
- If you decide to deactivate the notification, access to the negotiation will have to be shared manually via the access link provided by the platform.

1.4 Adding the counterparty and setting up notification
A. If you have activated email notification. You must choose between:
-
- Editing in the integrated editor: The counterpart will make changes directly in the text editor provided on the platform.
- Editing with the external text editor: The other party must download the document, make changes in their own text editor and then upload it back to the platform.

If you decide not to activate email notification, the platform will assume that you will manage the sending and notification process manually, sending the link to the document to the counterparty by another way.
In this case, after having filled in the counterpart's details (name and surname), you will be directed to a specific step explaining the implications of this option and instructions on how to ensure that the document versions are kept up to date on the platform.

Once the negotiation process has been submitted
When you start the negotiation process, you will be automatically directed to the Process Information tab. The content of this tab will vary depending on the options you have chosen during the creation of the process:
A. If you have activated the option to notify the counterparty by email:-
- Status: Indicates the stage of the negotiation. It can show one of the following statuses: ‘Not sent’, ‘Pending’, ‘In negotiation’, ‘Sent’, ‘Returned’, ‘Cancelled’ or ‘Finished’.
- Negotiation type: Specifies the editing format selected for the management of the document by the Counterparty (Editing in the integrated editor or Editing with external text editor).
- Name: Shows the first and last name of the Counterparty.
- Email: Indicates the Counterparty's email address.
- Link to the negotiation: Provides the URL to access the negotiation process. If the Counterparty loses the invitation email, this link can be shared with the Counterparty to gain access again.
- Subject: Subject text of the email sent to the Counterparty.
- Conversation: Records the history of messages exchanged between both parties each time the negotiation is sent or returned.

-
- Status: Indicates the stage of the negotiation. It can show one of the following statuses: ‘Not sent’, ‘Pending’, ‘In negotiation’, ‘Sent’, ‘Returned’, ‘Cancelled’ or ‘Finished’.
- Negotiation type: Specifies the editing format selected for the management of the document by the Counterparty (Editing in the integrated editor or Editing with an external text editor).
- Link to the negotiation: provides the URL to access the negotiation process. If the Counterparty loses the invitation email, this link can be shared with the Counterparty so that he/she can access it again.
Important considerations on the negotiation process
When a negotiation is initiated, the system will automatically generate an associated task. From that moment on, the internal party will be able to access the negotiation from two locations within the platform:
- From the document in which the negotiation was initiated.
- From the ‘Tasks’ tab located in the main menu of the platform.
For more information on how to manage tasks, please refer to this article.
2. Counterparty's view of the negotiation
If you activate the notification by mail, the Counterparty will receive a link to access the document and will see options depending on the type of editing selected.
2.1 Editing with the integrated editor

When the counterparty receives the invitation to negotiate, it can:
- Accept the negotiation on the green button in the right panel if no changes are required.
- Make changes, each change entered will be done via the automatically activated change control.

- Enter comments from the change control side panel.
- Send the negotiation back once you have finalised your changes.
2.2 Editing with external text editor
- Accept the negotiation. Click on ‘Accept negotiation’ if you have no changes to make to the document.
- Enter suggestions. Follow the steps described in the platform: in step one, click on ‘Download version’ to download the document.

Next, open the document in your preferred text editor (Word, Google Docs...) and make the necessary suggestions with change control enabled. Then go back to your browser to continue with step two, in the negotiation tab: click on ‘Upload version’ and select the new file with the changes.
- View and manage changes. Once you have uploaded the file, a panel will appear showing the changes or comments (if you close the panel, you can reopen it by clicking on any change or comment). In the ‘Changes’ section you can view all the changes made, filter them by user and type (depending on whether text has been inserted or deleted).

- Finalise your part of the negotiation. After inserting all your suggestions, click on ‘Send negotiation’ at the bottom of the right-hand panel. A window will open from which you can compose the email message that will notify the other party. Send it with the ‘Finish and send’ button.

- Download a copy of the document with your changes. When you have finalised your part of the negotiation and sent the email to the counterparty, you will be given the option to download a copy of the document.

As a user you will be notified when the counterparty finalises its suggestions and submits the negotiation and you will receive a copy of the latest version of the document when the negotiation process is successfully concluded.
Platform user negotiation options
The platform user who initiated the negotiation, or the people with whom you choose to participate in the negotiation, can access the negotiation environment from within the platform. They will also receive an email from the counterparty when they have finished entering their suggestions, along with a link to the negotiated document.
The negotiation functions available from the platform are similar to those of the counterparty, but with some additional options:
- Enter suggestions. You can make changes to the document using the editor. After making your suggestions, remember to save your changes.

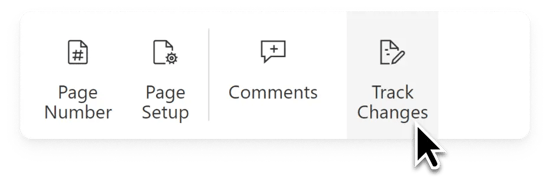
Enabling the ‘Track changes’ option will record the changes you personally make. By default, the option is activated, so that all changes are recorded in the activity, but you can deactivate it. This option is located in the menu at the top right of the editor.
- View and manage changes. When changes have been made, a panel will be activated on the right side of the editor (the panel can also be opened by clicking on any change or comment). In the ‘Changes’ section you can view all the changes made, filter them by user and type (depending on whether text has been added or deleted) using the drop-downs at the top, and accept or reject the proposals of the opposing party.

- Add comments. By selecting one part of the text and right-clicking, you can access the ‘New comment’ option and add comments for the other part.

- View and manage comments. When there are comments, you will be able to see them in the right panel, in the ‘Comments’ section (remember that you can also open the panel by clicking on any change or comment). Each comment will be accompanied by the author's name, as well as the date and time it was written. By clicking on the three dots on the right-hand side, you can reply to it or resolve it (if you are the author of the comment, you can also edit or delete it).

- Access the options in the right-hand side panel:

- Information. Displays the general data of the process.
- Activity. Reviews all the actions carried out in the negotiation.
- Version history. Access to all the versions of the document generated during the process.
- Team options. Add private notes and mentions. Teammates and followers do not negotiate directly with the other party, but can access the process and use all team options, and are notified of negotiation updates by email.
- Metadata. Access summary information related to the document, such as the user who created it, the creation and modification date, the status, and more. You can also add custom metadata in this section.
- Files. You will be able to view the files in case they have been added to a certain field of the form during the creation of the document or add new files.
- AI Assistant. Access Libra, Bigle's legal artificial intelligence assistant.
- Resend the negotiation. After entering and saving all your suggestions, comments and answers, you can resend the document to the counterparty by clicking on the ‘Resend negotiation’ button. This will open a window from which you can compose the email message that will be used to notify the other party.

- Finalise the negotiation. When an agreement is reached and the negotiation is successfully concluded, click on ‘Finalise’ in the top bar. After this action, no further negotiation will be possible and both parties will receive the latest version of the document by email.
- Cancel the negotiation. In case you do not want to continue with the negotiation process, click on ‘Cancel negotiation’. This irreversible action will terminate the process.
Please note that ending or cancelling the negotiation process will also automatically end its corresponding task.
When the negotiation is terminated or cancelled, it will still appear in the process panel on the left, from which it can be consulted. From this same screen, another negotiation can be initiated if necessary:
