Multiple choice
Field to choose one or more options.
The multiple choice field is one of three choice fields (along with the single choice and the dropdown). It allows us to select one or more options among several previously personalized possibilities.

For the field to work properly, you need to set its tags in the template document. In this article on “Tags for option fields” you will find all the necessary information on how to do it.
Description of the multiple choice field options
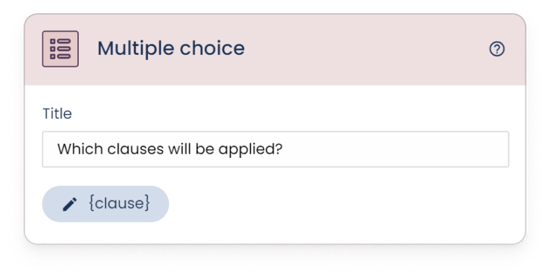
- Title: text that describes the purpose of the field.
- Tag: you must introduce the same tag that you have written in the "template document" so that the field is correctly linked with its position in the document.
Set options
In this section you must introduce all the options that you want the field to have. Each option consists of:
- Title: this is the name or value that describes the option.
- Option tag: here you will write the tag that will refer to this option. This article shows you how to configure the tags for option fields in the document.
Use the “Add option” button to add as many options as needed.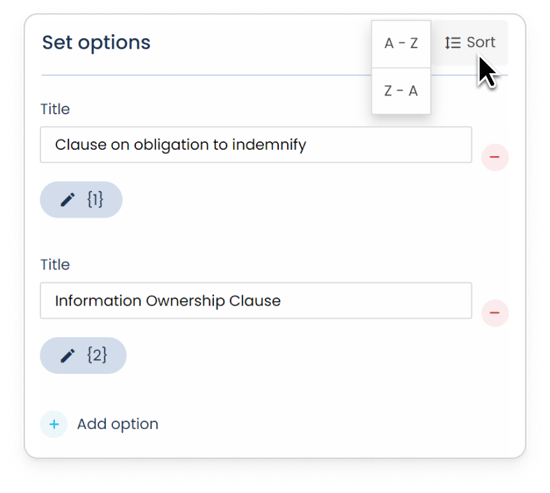
By clicking the "Sort" button, you can sort the options in alphabetical order (from A to Z, or from Z to A).
Advanced options
1. Subtitle: used in case you want to add additional information to the title.2. Optional field: used to make the field required or optional. When activated, you will be telling the software that this field, despite being asked, will not necessarily have to be answered.
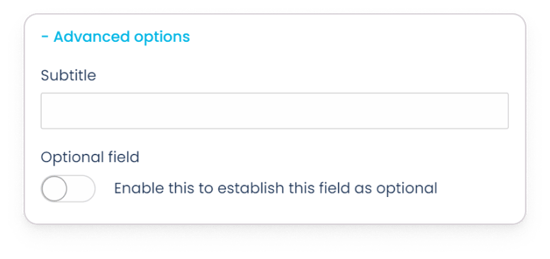
3. Blocked field: enabling this option will restrict the field to be automatically populated with predefined data, whether by internal means (copying data from another document) or external (bulk document creation, integrations, API...).

4. Set connection type: if you have configured the tags to automatically add connectors between the titles of the options, in this section you can choose the desired option of punctuation marks ("," or ";") and conjunctions ("and" or "or").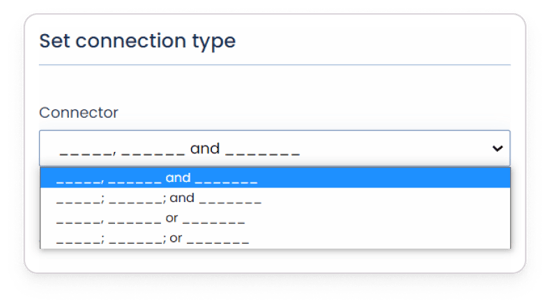
5. Set numbering: if you have configured the tags to automatically add numbering to the title of each option, in this section you will have to activate numbering and then select the desired option through the dropdown (numbers, letters or roman).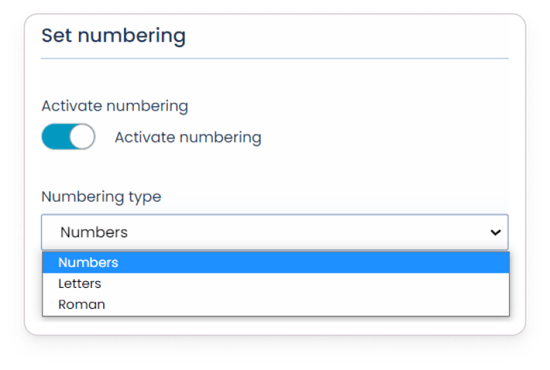
7. Form metadata: if enabled, the values entered in this field will be saved and used as metadata.

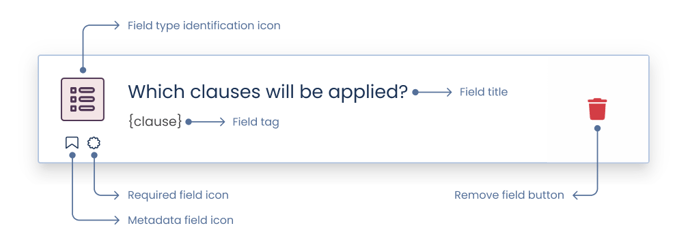
Once the field is set up, save the changes. The card folds, showing information to check the basic configuration of the field:
