Metadata
Get the most out of your Workspace by using metadata and creating custom views to classify, track, and control the end-to-end contract lifecycle in a single place.
What is metadata and what is it for?
Metadata is data obtained from the different phases of the documentary process. For example, the creation date of a document, the user who created it or the template it uses, are metadata.
Taking this into account, we will be able to create personalized views and filters based on the information and characteristics that interest us the most in each situation.
In a more technical way, we can say that metadata is, literally, data that describes other data. It provides information about the content of the data produced when generating documents.
Types of metadata
A. Basic: The basic metadata are those provided by the platform, which are created with the document's elementary information.
Some of them are collected by themselves, such as the creation user, the creation date, the modification date, the percentage of completion, the status of the firm or the template used. Others, on the other hand, are editable from the information panel, such as the name of the document, its description, its status (started, ongoing, under review, revised or finished), the group and the assigned user.
In addition to those mentioned, new metadata will be added when starting a signature, negotiation or certified email process.
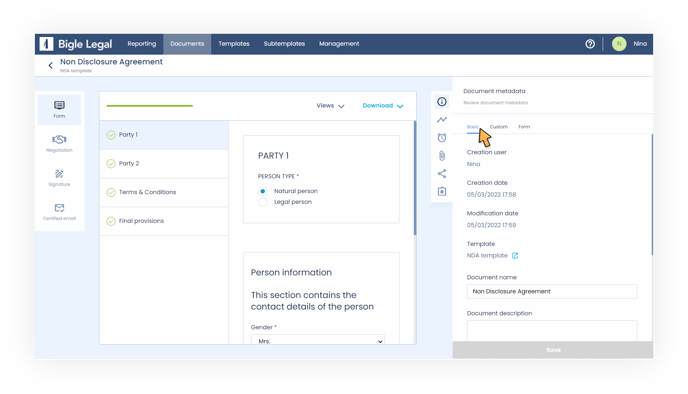
B. Custom: Custom metadata are those that we create manually and can fill in or edit from the document information panel.
Since each organization is unique, the platform allows you to define, with total flexibility, what metadata is going to be used (for example, the expiration date of the document, the inclusion or not of a penalty clause, or certain amounts).
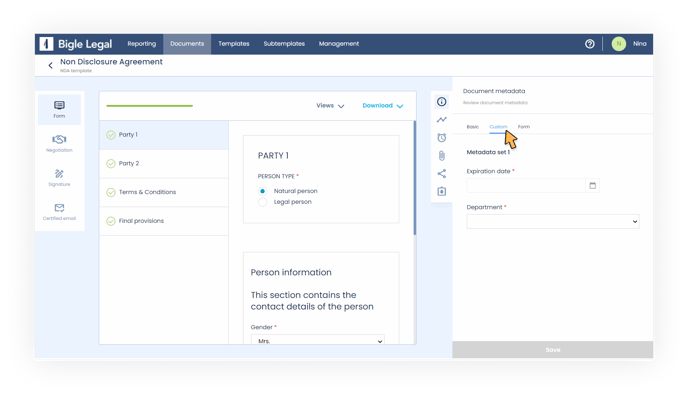
To set up this type of metadata, we will need to create custom sets. Metadata sets are "forms" of metadata. They are created from the Administration section (in the platform's main menu), in the Metadata tab, following these steps:
1. Click on “create set”.
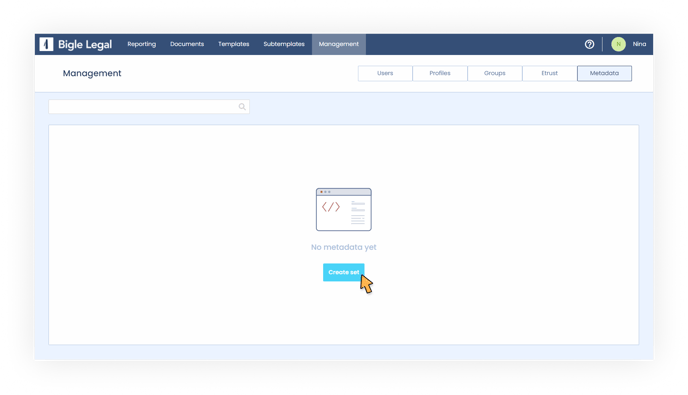
2. Give the set a name and optionally add a description.
3. In the "Details" section, create the field cards. They can be title, short text, long text, date, number, single choice, multiple choice and selector fields (find out more information about each of them in this article).
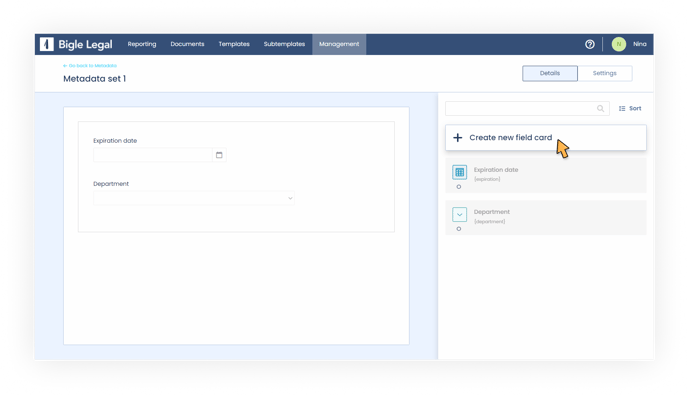
- After creating the fields, we will drag and drop them in the form on the left by clicking on the six little points on the left border of each field card.
4. In the same "Details" section, we can search and order all the fields that we have been creating.
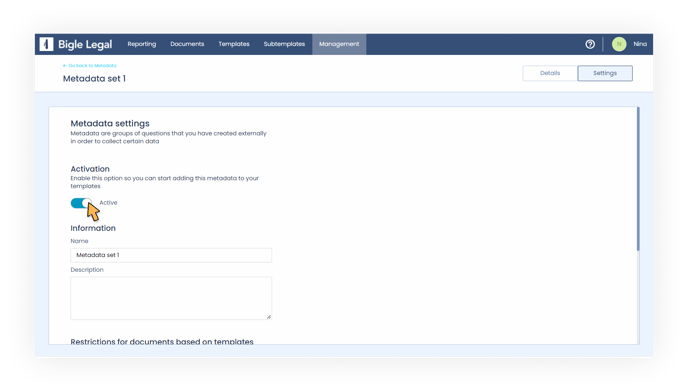
5. In the "Settings" section, in addition to modifying the name and description of the set, we can activate or deactivate the functions on restrictions that interest us:
- If we want the set to be applied to documents based on templates, we must choose which templates it will be applied to and we can activate or deactivate the option to require the set each time a document is created.
- If we want the set to be applied to documents loaded as Word or PDF, we must activate the option “include metadata set” and we can activate or deactivate the option to require the set every time a document is uploaded.
- To apply the set to requests, it will be necessary to enable the option "allow the set to be applied on requests".
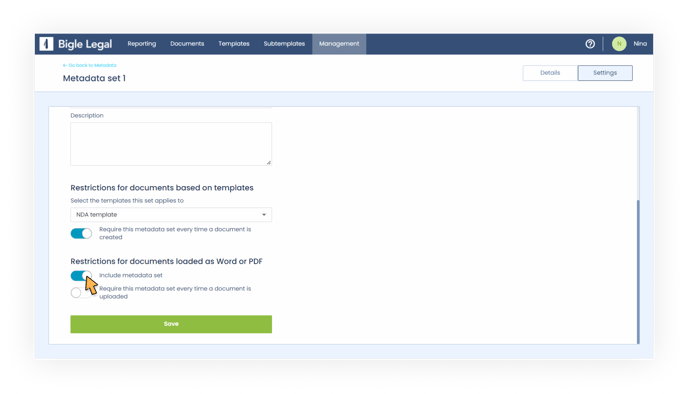
6. For the set to start being applied, it will be essential to check the activation option and click save, on the same “Settings” page.
Learn how to schedule automatic alerts on custom metadata sets in this article.
C. Form: Finally, we have the metadata automatically extracted from the values entered in the form fields of the document.
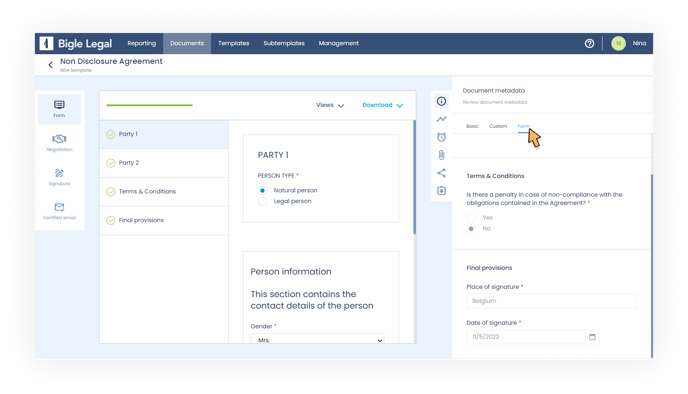
In order for a field to be used to generate metadata, we will have to indicate it in advance, when configuring the template form:
1. We create a template or select the one we want to edit.
2. In the “Fields” section, we select the field that we want to generate metadata.
3. We click on “Advanced options”, enable the option “Form metadata” and save the changes.
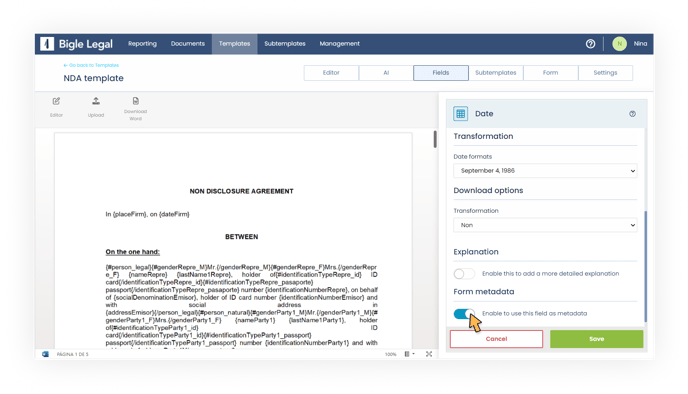
This metadata will only be generated and updated when you enter and modify the answers in the form, so they will not be editable from the document information panel.
How to view and edit a document's metadata
During the creation of the documents, and throughout their management, we can see all the metadata of a certain document and, in the cases already mentioned, fill in or edit them.
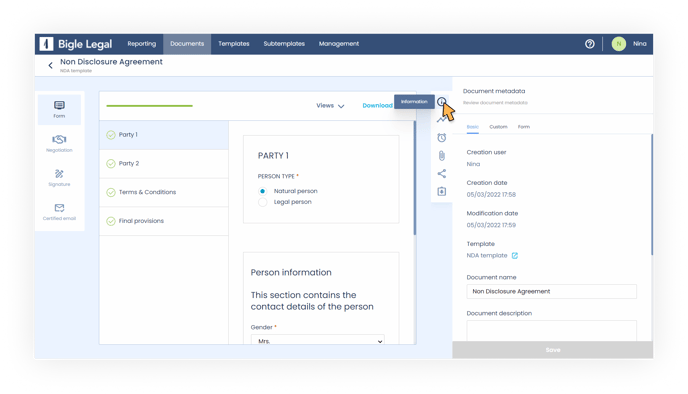
To do so, we will have to open the document in question and access the "Information" window on the right side panel. There, we will find the basic metadata provided by the platform, the customized ones filled in by the user and those that the system automatically captures from the form, separated into three blocks.
Now we know what metadata is, what types exist and how to configure and fill them. But the most important thing is that, thanks to them, we can create custom views to monitor contracts. Find out how in this article on how to visualize the information provided by metadata thanks to Reports.