Let's imagine a process of buying a flight ticket, in which you have to decide whether or not you want an invoice to continue the process.
Depending on the option we choose, the airline website will ask us for some additional information. This is called conditioned fields, since the information requested from us varies depending on our response.
You can do the same in an automated document, so that only the fields that apply are shown, depending on the options selected.
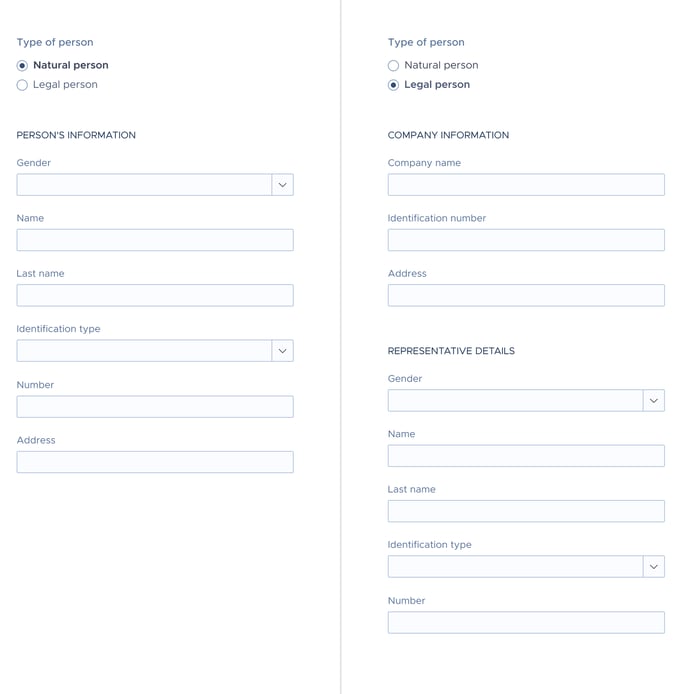
In the previous example, you can see how, depending on whether you are a natural (left side) or a legal person (right side), the form shows some fields or others. Likewise, the text corresponding to the chosen option must also appear in the document.
- Text for natural person:
Mr. __________________, with _________ number _________, with address at __________________.
- Text for legal person:
Mr. __________________, with _________ number _________, in his condition of _________, with _________ number _________, and registered office at _________.
Until the arrival of document automation, it was necessary to have 2 versions of the same document, each one with the information corresponding to the type of person for whom it was intended, now it is no longer necessary, the 2 versions coexist in the same document.
To achieve this behaviour, we will start by preparing our document in the following way:
(We continue with the previous example of Natural Person and Legal Person).
We enclose each part of the text with an opening and closing tag, plus the type of option. If you don't remember how these types of fields are constructed you can always see more about how it was done here ⇢
- Natural person:
{% raw %}{#person_natural} __________________, with _________ number _________, with address at __________________.{/person_natural}
- Legal person:
{#person_legal} __________________, with _________ number _________, in his condition of _________, with _________ number _________, and registered office at _________.{/person_legal}
This way the document displays one paragraph or another depending on what is answered in the form.
Once you have prepared the opening and closing tags, you must add all the tags of the information that will be requested depending on what is answered.
- Natural person:
{#person_natural}{#gender_m}Mr.{/gender_m}{#gender_f}Ms.{/gender_f}{nameNatural} {surnameNatural}, with ID number {idNumberNatural}, with address in {addressNatural}.{/person_natural}
- Legal person:
{#person_legal}{#gender_m}Mr.{/gender_m} {#gender_f}Ms.{/gender_f} {nameLegal} {surnameLegal}, with ID number {IDNumberLegal}, acting as representative of {company}, with tax number {taxNumber}, and registered office at {addressLegal}.{/person_legal}
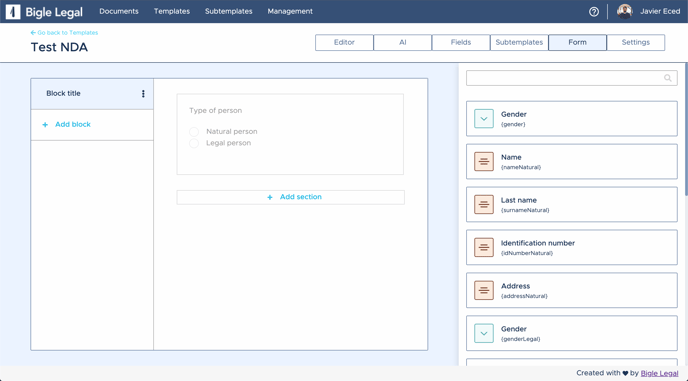
Now that we have all the parts ready. It is time to upload the document to the platform and prepare the form fields, as you see below:
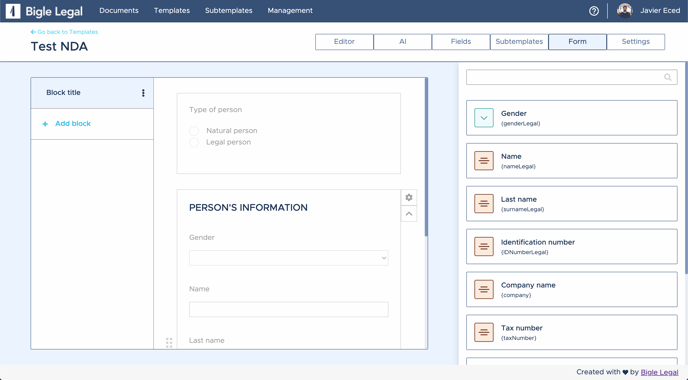
Once that part is finished, we go to the form tab to sort the fields into sections and to configure under which conditions each section will appear.
We have to create 3 sections:
- In the first section we will include the Single option field, that allow us to choose between a natural and a legal person (in the video above you can see how to create said field and, in case you have any doubts about it, you can also read this article that explains it).
- In the second one, the fields that correspond to one of the options (example: natural person).
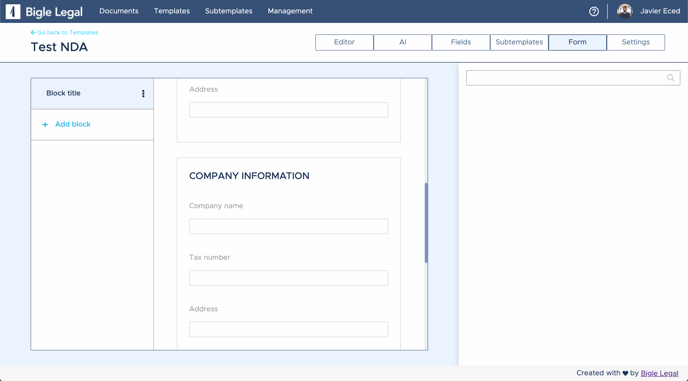
- In the third one, the fields corresponding to the other option (example: legal person).
Now that we have placed the fields in their respective sections, we must condition them to the initial question (Type of person), so that when one option or another is chosen, the corresponding section appears.
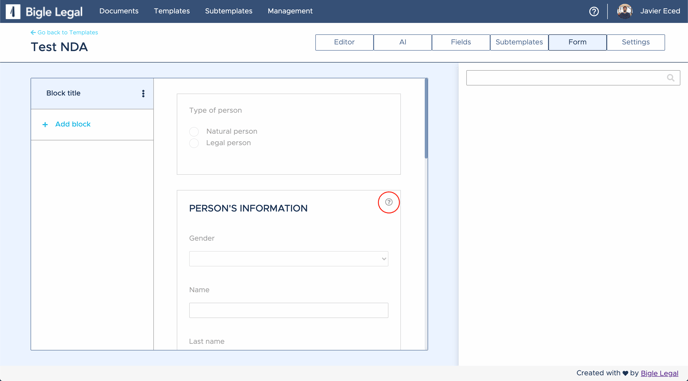
When we place the mouse over the Natural Person section, we will see that a "wheel" ![]() appears in the upper right-hand corner of the section, which we click on to open the panel and go to Options.
appears in the upper right-hand corner of the section, which we click on to open the panel and go to Options.

Once inside, click on the Conditional Section switch to activate it.
We choose the field to which we want to condition this section, in this case the question Type of person. Once we select it we see that 2 more options appear; Condition and Value.
- Condition: in this case, we choose "equal to".
- Value: shows us the options available for the chosen field (in this case Natural person and Legal person).
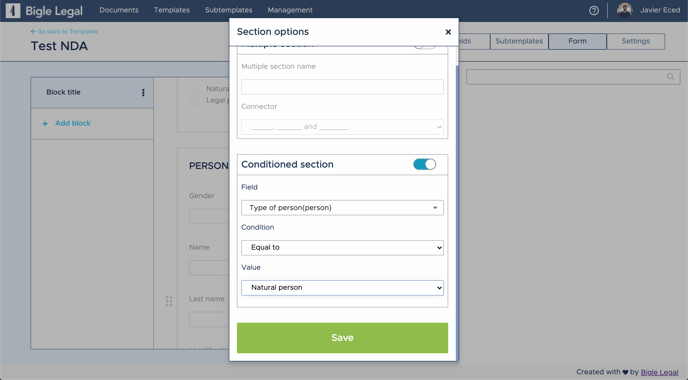
*What we are indicating is that if the answer of the field is equal (=) to one of its values (example: Natural person), then it will show the indicated section.
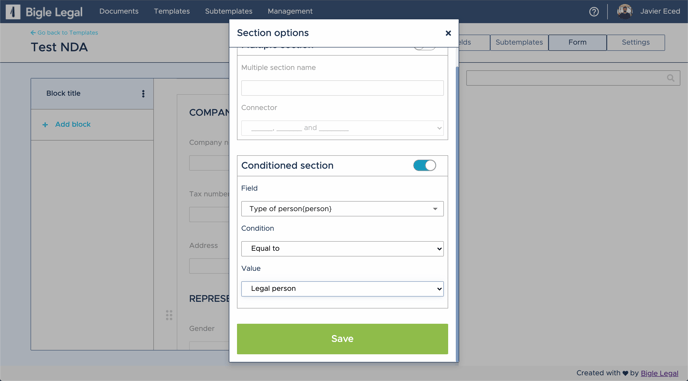
Save, and this section will be configured. Repeat the process with the section 'Legal person' and our form and documents are ready to adapt to the needs of each case.
When a section is conditioned, we will see that an icon appears in the top right-hand corner of the section.
How it is displayed on our form
It is time to create a document to understand how this configuration applies when we are answering the form:
Condition of another condition
Now that we have understood how conditions work we can go one step further in the configuration.
Chained conditionals:
Any of the fields found within a condition can also be used to establish a new condition. Consequently, if the first one is not fulfilled, this second one will never be shown and so on.
List of fields that can be used to establish a condition:
{% endraw %}